Pendle W2 bike rack review

Who are Pendle Bike Racks? (aka PBR)
On a fairly regular basis I hear the statement "we don't make anything in this country anymore" and coming from a line of engineers, makers and fixers of all flavours, that doesn't sit comfortably with me. Thankfully, against all the hardships that businesses seem to be facing at the moment, that statement isn't true.
Pendle Engineering was founded in Lancashire in 1977 as a family run business, and from this Pendle Bike Racks (PBR) were introduced in 1988.
The values of the business are that everything they make must be strong, simple and safe.
This attitude comes deeply engrained in the local landscape itself. Pendle Grit is part of the millstone grit family and is renowned for being very hard wearing and durable.
From their base in Nelson, PBR carry out the design, manufacture, testing and despatch of all of their products to these principles.
The PBR product range consists of storage solutions, trailers for transporting bikes and a selection of roof and towbar mounted bike racks for a single bike through to a trike or even a tandem.
Review of the Pendle PBR W2 cycle carrier
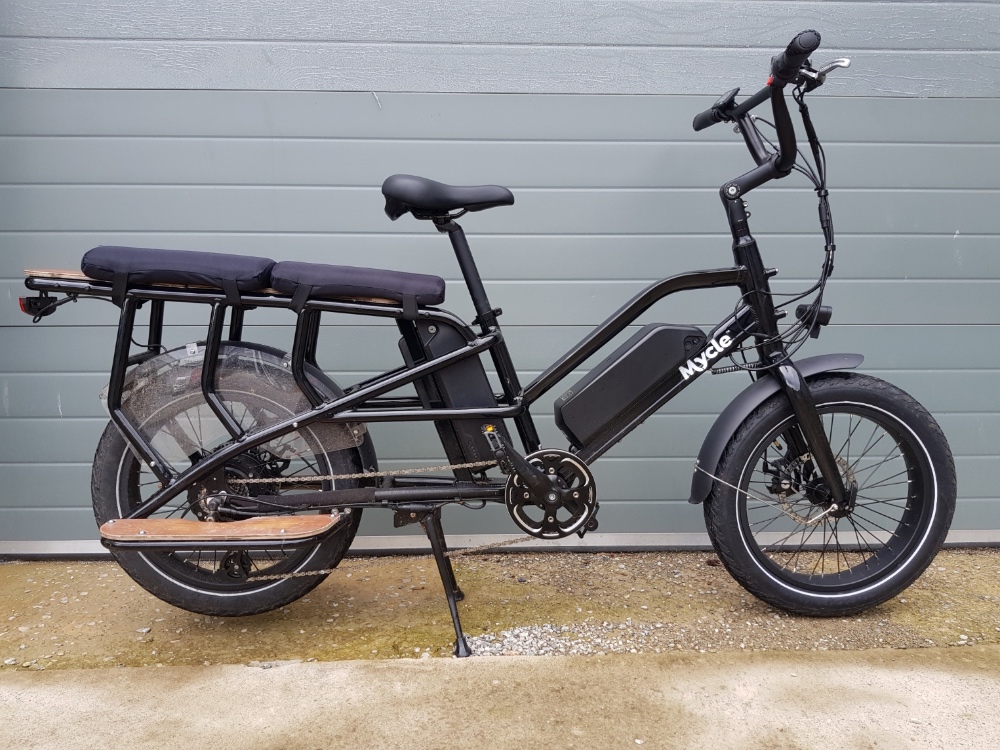
Pendle have sent us one of their W2 cycle carriers, which is a two bike rack that securely fixes to your tow bar.
It is fabricated from high tensile steel and given a tough finish in a 'Pendle Orange' and complimentary "Storm Grey' textured powder coat finish.
It has been designed to fit almost any vehicle with a tow bar and carries almost any type of bike. It is also e-bike compatible and has a maximum rack load of 70kg, which should comfortably handle the heaviest electric bikes.
Bikes are loaded onto the rack and held securely in place by the wheels and an upright support bar. Straps are then used at the three contact points to hold the bike into position.

Inside the box
The Pendle W2 rack arrived in a good quality cardboard box sealed with recyclable reinforced parcel tape on the exterior. Inside there is an instruction manual to guide you through build up and installation.
The internal packaging is made from cardboard with all sections tailor made to ensure a snug fit with the outer box. This ensures that components don't move around, bash into each other and cause damage.
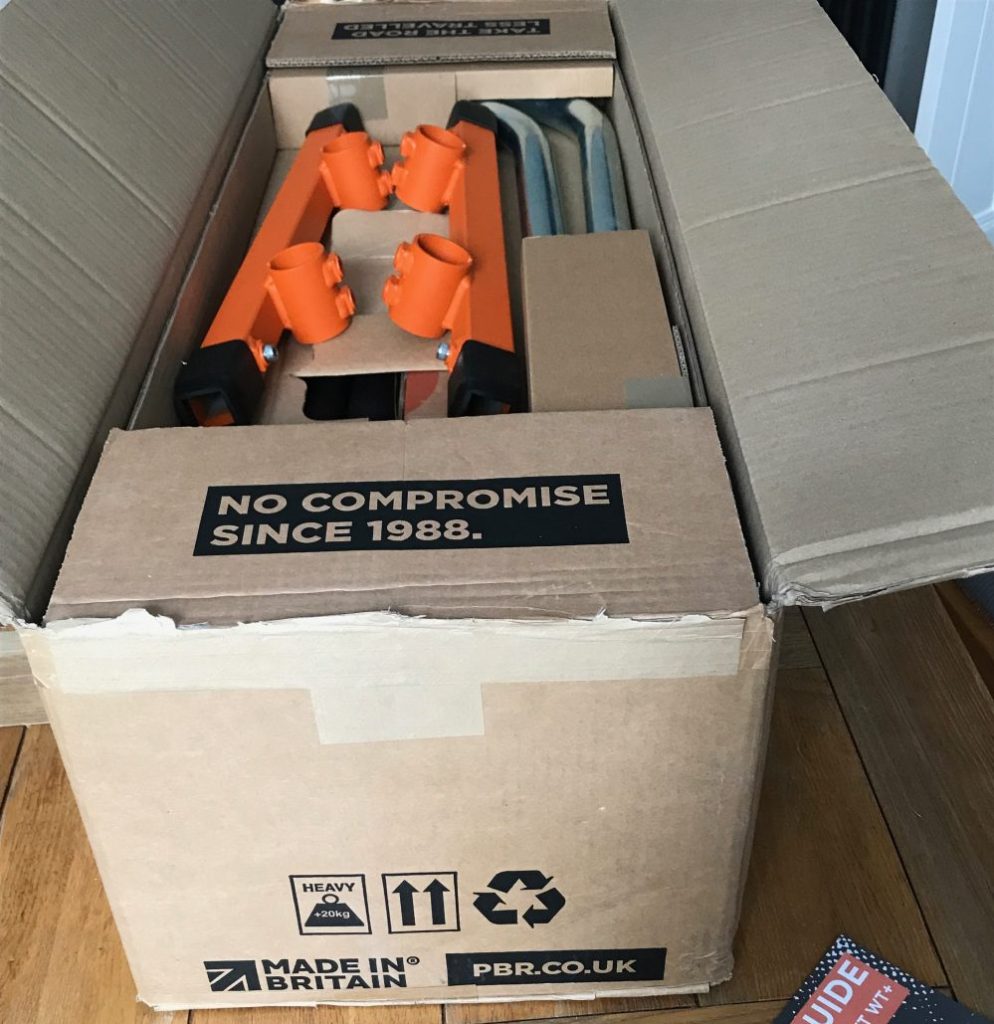
All fixings are packaged in plastic bags to keep things in order (hey PBR - maybe the next packaging step could be to use paper ones instead?) Pendle also provide a set of tools in the box to build up the rack.
The fixings themselves look and feel good quality and the rack components all had a good thick layer of powder coat in place with no damage or scratches evident.
PBR W2 bike rack - the build
Apart from a lucky few, most people don't tend to have a workshop where they can tinker and construct.
So with this in mind, we're making use of the good old fashioned kitchen table to lay out the components of the Pendle W2 bike rack to see what we have got.
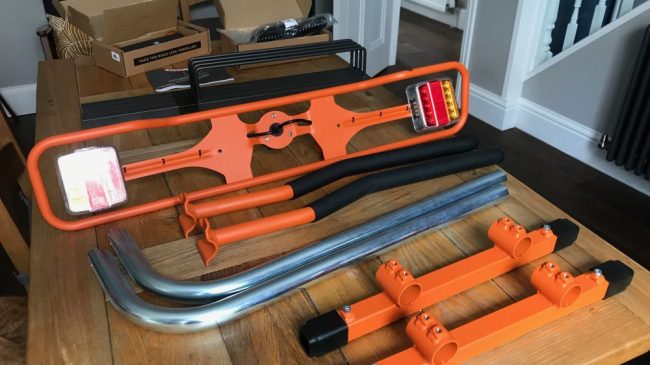
As you can see, the bike rack doesn't come ready built so you need to be happy to follow the comprehensive instruction booklet and put it together yourself.
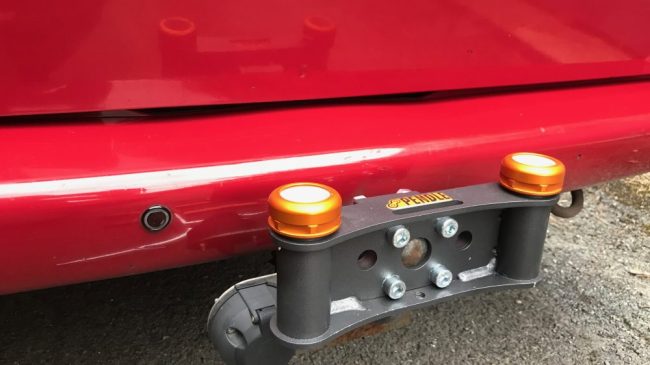
How the Pendle W2 bike rack attaches to the vehicle
The Pendle W2 bike rack attaches to the vehicle by tow bar and is suitable for Swan neck, detachable and standard 2 bolt flange tow bar styles.
The standard tow bar style also has a 'behind the ball' option for a permanent mounting - we didn't test this aspect as it would have involved a trip to the garage to remove and then replace the tow bar to the correct torque, but we talk about what this involves later in the article.
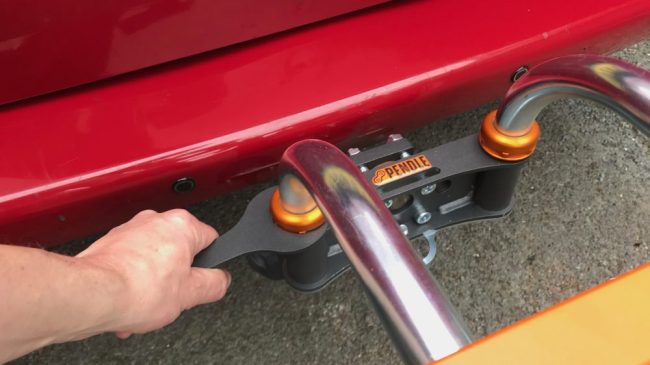
The first step is to attach the universal block. In our case we have a standard 2 bolt style tow bar and are fitting the rack for temporary use using the 'on the ball' mounting option. The universal block is placed on the front with a clamp at the back of the ball and four bolts clamp the two pieces together.
It is recommended to have all fixings to hand in a container as you do not want to be chasing bolts, nuts or washers down the road.
Assembling the PBR W2 rack for the first time
Once the universal block has been bolted into position the rack assembly is built up on this 'hub'. There are two main poles that slot into the block and a chassis piece for each bike.
Onto each chassis are fixed an upright pole for resting the bike against and a D-Loop for each wheel.
On the back of the rack is an LED lighting unit that attaches to the ends of the main poles with connecting cable that plugs into the back of the unit and your tow bar electrics socket supplied in the box.
One tip I have is that before securing the outer chassis into position, you should trial fit the outer upright to ensure there is enough tubing left for the lighting board to be installed on the ends of the main poles.
Also, the instructions don't mention it but don't forget you also need to arrange for a number plate to affix to the towbar before you use the rack!
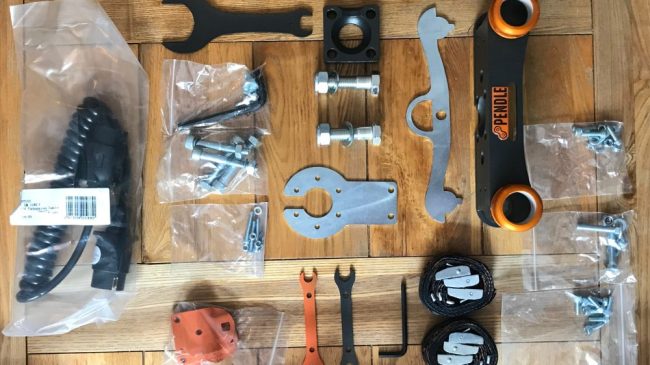
How easy are the instructions to follow?
The manual guides you through the process of building up the rack and gives detailed instructions with images and quantities for all of the components contained in the box.
I found the instructions straightforward to follow, however I feel Pendle could improve the experience by labelling the fixings bags with the details of their respective contents. You can work it out from the image in the manual, however not everyone has encountered an M5 Nyloc nut before so feel this would give greater confidence.
Setting the Pendle W2 rack up for bikes
With the rack in place, the D-Loops can be adjusted to suit the wheelbase of the bikes you want to carry.
Pendle tell us that the standard set up accommodates bikes with a wheelbase (distance between the centre of the two wheels) between 950mm and 1300mm. We've tried a variety of wheel and frame combinations and it accommodated 24" up to 29" wheel bikes and fits tyres up to 3" wide.
We also squeezed a very long wheelbase 20" wheel bike (the Black Mountain HUTTO DISC) OK and carried it safely around.
We also tried a Specialized Jett 20 and an Islabikes Beinn 20 Small on the rack. They felt very precariously balanced as the rear wheel didn't fit into the D-Loop where it should secure into place. We didn't go anywhere with these bikes, as they weren't ours!
How does Pendle W2 bike rack perform?
With some racks that we've tested there has been little compromise in construction and it has taken plenty of adjusting and tweaking to get the bikes to fit. Handlebars need rotating, seat posts removing and it feels like a large puzzle to complete every time.
Thankfully, this was not the case with our test of the Pendle W2. The setup of the rack allows a great deal of flexibility so you can move the chassis, uprights and D-Loops around easily.
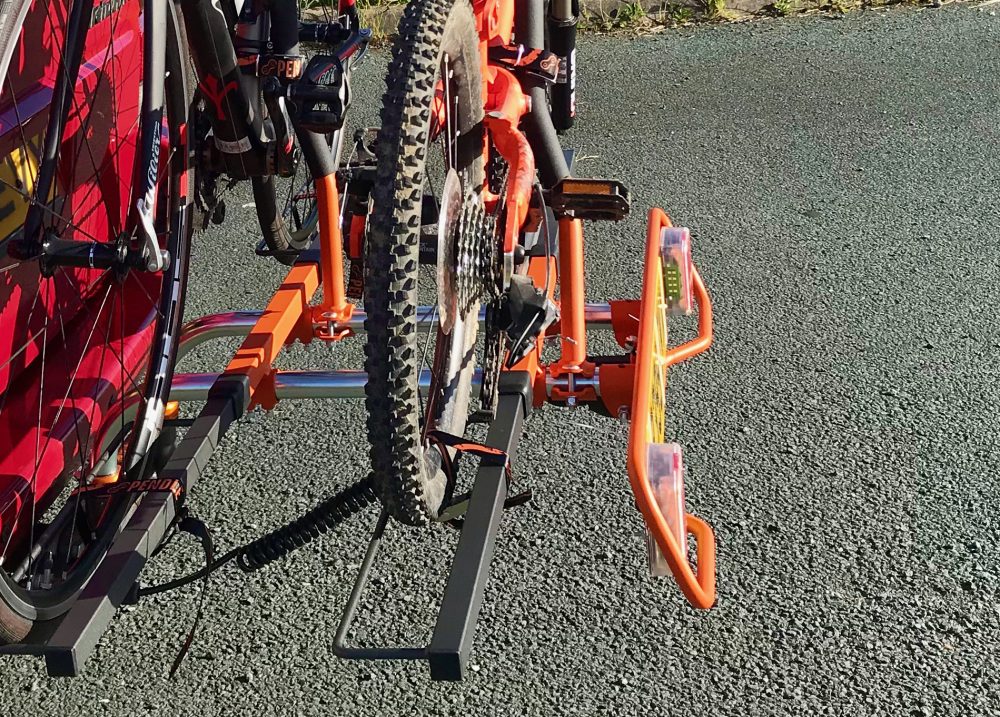
When you have everything in position it's a painless process to get the bikes onto the rack. The wheels slot into the D-Loops and the frame then rests against the upright. We would advise that the bikes are loaded in alternating directions so that the handlebars don't clash.
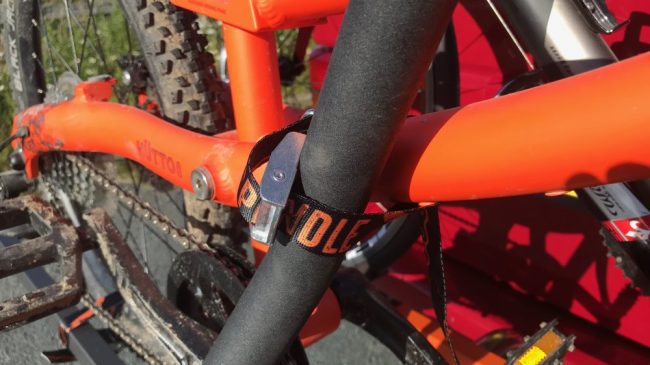
Then it's simply a question of using the supplied straps to secure the bike at the wheels and frame. It really is a simple system and pretty much faff-free.
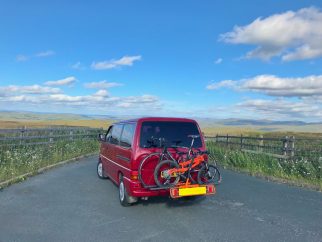
Out on the road
In motion the W2 rack feels stable and driving over the pockmarked roads it didn't fluster it at all. Everything felt safe and secure.

I had been curious as to how the tie straps would perform, but there has been no movement of the bikes whilst in use and on arrival everything remained secure. It's worth noting that the Pendle W2 is a fixed position rack, so it can't be tilted down to gain access into the boot.
Removal of the bikes from the Pendle W2 bike rack only takes a few moments. You just need to loosen off the straps and lift the bikes down.
Don't forget to put the straps somewhere safe though, as they are separate items and not attached to the rack. Losing one on a trip would obviously be a bit of a pain.
Pendle W2 bike rack - removal for storage
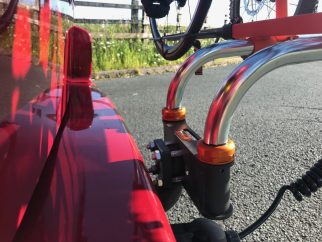
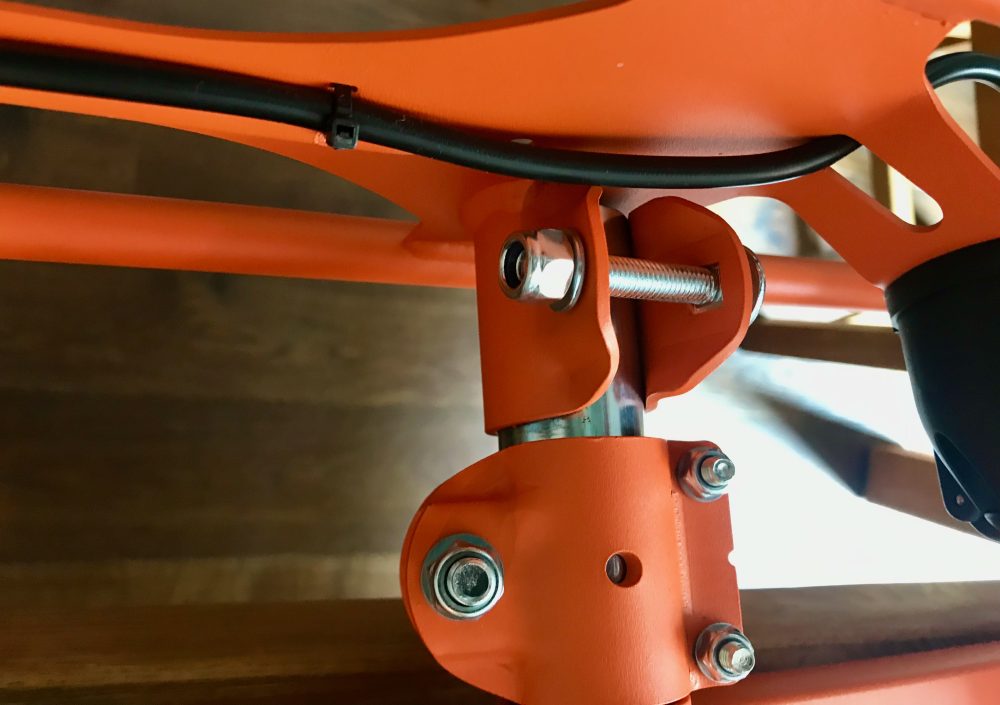
The rack can be removed for storage by undoing the orange socket caps on top of the block, removing the security plate that keeps the poles in place and lifting the rack out.
I've found that greasing the ends of the main poles makes removal from the universal block easier to do. Wiggle to release the bond, then lift the rack up by the poles.
Carrying the two bike rack is reasonably easy as its shape lends itself to getting good hand grip positions. It's fine carrying the W2 rack with the D-Loops in place and this is how I would move it around. However, it is much easier to manoeuvre with D-Loops removed.
The W2 two bike rack without the universal block weighs in at 14.5 kg (19kg including) so it is quite heavy, but no more so than racks from other brands. Where I live often requires me to park quite a distance from the house, so it can be quite an effort. Obviously, if you have a driveway or garage then that's not so much of a problem.
Storage space required for PBR W2
A great feature is that you can remove elements for storage. If you want to keep it complete and lay it flat, a space 1.5 metres wide by 0.8 metres should cover it, but you can lean it up against a wall (securely) to seriously reduce that.
Plus, if you need to you can take out the D-loops which brings the width down to just over the width of the lighting board; just over a metre.
Use of tow ball for other items such as a trailer whilst the W2 is fitted
If you intend to use your tow bar for more than just this bike rack you need to consider carefully how to mount it.
Firstly the rack can be mounted 'on the ball' but this requires the universal block to be unbolted before using the tow bar for something else. Obviously this is not an ideal situation if you regularly tow other things. Ideally you want to leave the mount in place and just slot the rack into place when you head out on your ride.
If you have a standard 2 bolt flange tow bar the mounting block also can be positioned behind the ball so the ball can be used for other purposes.
This requires the flange tow ball to be unbolted and the block sandwiched between the existing bracket on the vehicle and the tow ball then bolted back on with new bolts supplied.
It might be best to get your local tow bar supplier/garage to do this as the bolts need to be torqued up to 249Nm for safety and it is unlikely that you will have the tools for this at home.
Note that this "behind the ball" option is only available for standard 2 bolt flange tow bars, so if you have a Swan neck or detachable tow bar and regularly need to tow different things this might not be the best bike carrier for you.
Once the mounting block is in position behind the tow bar, you can even use the W2 bike rack and tow something (such as a caravan or trailer) at the same time, so long as the rack clears the drawbar of whatever you are towing. Pendle sell special height extenders to lift the bike further up above the drawbar which give you additional vertical clearance to carry your bikes on the bike rack whilst towing. This only works on the W2 rack we're reviewing, and not the 4 bike or trike versions.
Things to be aware of with the Pendle W2 bike carrier
Security
A point to note is that there are no bike security features included. Some racks from other brands have lockable straps, although they tend to be plastic which would obviously take seconds to cut through. However, even something as flimsy as this might put off an opportunist thief. As always, if you're leaving bikes unattended make sure they're locked!
Removal of D-Loops when not carrying a bike
The instructions say that if you don't have a bike on the rack you should detach the D-Loops. This can be a bit annoying if you're dropping the Sprogs off at their cycle session, heading off to do the shopping and then picking them up again later. I certainly don't want to be removing and reattaching parts of the rack several times in a day. Plus they seem reasonably secure - the only possible issue being the bolts are underneath the D-Loops and a bit inaccessible.
I asked Pendle why this was, and they said "It is “belt and braces” advice. Once a bike is loaded, the d-loops are effectively held captive in the chassis. So this advice covers situations where the bikes aren’t loaded. There is a bolt holding the d-loop in place, but should that not be sufficiently tightened by the user then there is a chance the d-loop could come loose."
This just reinforces the fact that you really should always check every bolt on what ever you're towing behind you on each use. I suspect most people ignore this "belts and braces" advice, and I know I have!
Torque values
This leads me nicely onto ensuring that you've got the rack attached to your vehicle correctly. Recommended torque values are given for certain fixings but this is not explained. You need the correct equipment to do this - don't guess as you'll have a serious issue on your hands if the entire rack falls off whilst you're driving. If you don't have a torque wrench or can't reach the required value by hand take it to your local garage - better safe than sorry.
Risk of loss of tie straps
The straps that secure your bike to the rack aren't attached to the rack. Do not lose them whilst you're on your travels as you'll struggle to get home. However, they are easily replaceable so if the worse does happen you're not going to have to replace the rack or spend ages chasing down exact parts for what may be an obsolete model in years to come.
Spare parts
The Pendle website has an extensive range of spares, so if you do manage to loose a key part (or need attachments for two different vehicles) you don't have to dump the carrier and buy a new one. We really like this sustainable focus of the business.
Pendle W2 (Two bike rack) review summary
The Pendle W2 is a solidly engineered tow bar mounted solution for carrying bikes. It is a simple design that lends itself to getting your bikes on and off quickly and easily - lift the bike up, place the wheels into the D-Loops, rest the frame against the upright and tighten up the three straps. Quick and simple - leaving more time to ride!
The D-Loops can accommodate tyres up to 3" width and we've tested them with wheels up to 29" diameter.
A big plus point for the rack is that there are no plastic straps or components to snap or break, thereby minimising the potential for high levels of rage at the side of the road.
I think "robust" would be an appropriate descriptor for this rack. It's no lightweight, being built from mild steel rather than alloy of some of it's competitors, so you have to be happy to carry roughly 15 kg to and from your vehicle.
My thoughts on the construction of the Pendle W2 bike rack are that if we were to have an apocalyptic event, within the rubble you'd possibly find a group of cockroaches using a Pendle W2 bike carrier as a shelter! Failing that, it certainly feels as if I'll be handing it down to the grand kids.
So the big question is would I buy one myself? Taking everything into account the answer is a resounding yes.
I love the simplicity of getting the bikes on and off, the ruggedness of construction and the reassurance the lifetime warranty provides.
Pricewise it's within the ballpark for e-bike capable racks, and I like the fact that, should you damage a component, spare parts are available to increase the lifespan of the rack. Although we'd probably go for the 4 rack version to accommodate all our bikes.
Is it perfect? Of course not, but for my needs we'd get along just fine.
Where to buy the Pendle Bike Racks
Pendle Bike Racks are available from Decathlon. We have tested the W2 2 bike version (£350) but they also have the W4 4 bike version (£490), plus the WT which fits a trike (£330), and the WT+ (£400) which carries a bike and trike, so hopefully there's one to suit your family.

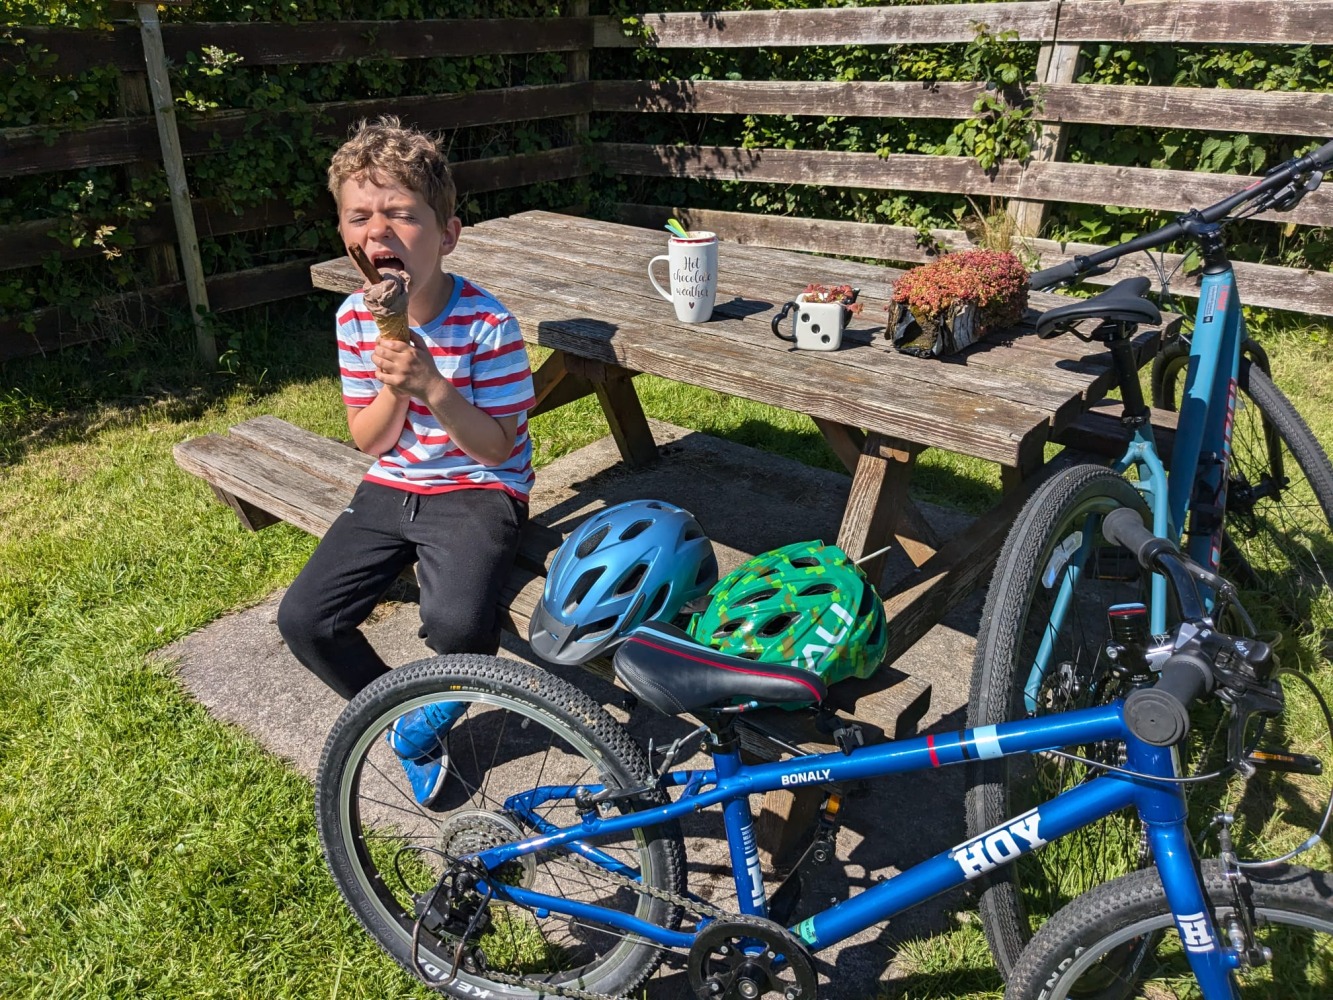

Summer cycling: better for your wallet and your mood
With fuel prices rising, many families are looking for simple ways to cut everyday costs. The good news? Summer is the perfect time to get back on the bike.
Long daylight hours, warmer weather and school holidays make cycling an easy and enjoyable choice for days out, local errands and family adventures.
Whether you're riding to save money, enjoy the fresh air or just add a little movement to the day, cycling can make everyday journeys simpler, healthier and more fun.
Explore our guides for getting started, inspiration and tips to help you make the most of the sunny months ahead.

Comments